The Broad: Waiting Works

engaged!         Today was a good day for my husband and me! We woke up at 12:30pm (!) – this NEVER happens to us by the way – and we were panicking and rushing because there were still a million things we wanted to do while in Los Angeles. The hubs’ class starts on Monday and when he goes to class he will be busy from 7am until 8pm for the entire week, meaning we won’t have the chance to go around anymore so we have to squeeze in as many attractions as possible the week before his classes start.

Earlier this morning, we facetimed with our two little girls which probably explained why we got up so late. We woke up at 4am (LA time) so we could call them up at 8am (Manila time). The girls have a busy day ahead of them – Kidzoona and games with their aunts so they were happy babies. After chatting with them we promptly fell back to sleep.image-0-02-01-0cc13c1995f06de581e43cebedb8dc5d359c428ac6bf8804cd562393299423c5-V

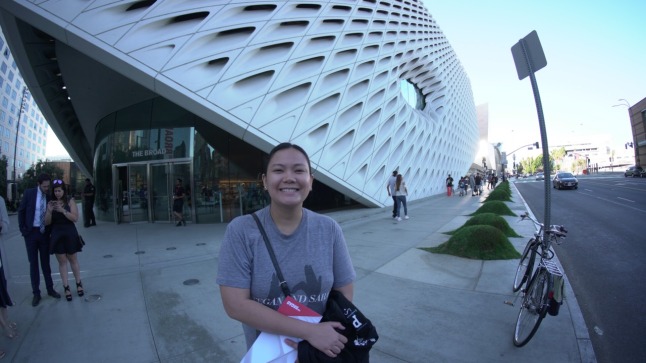
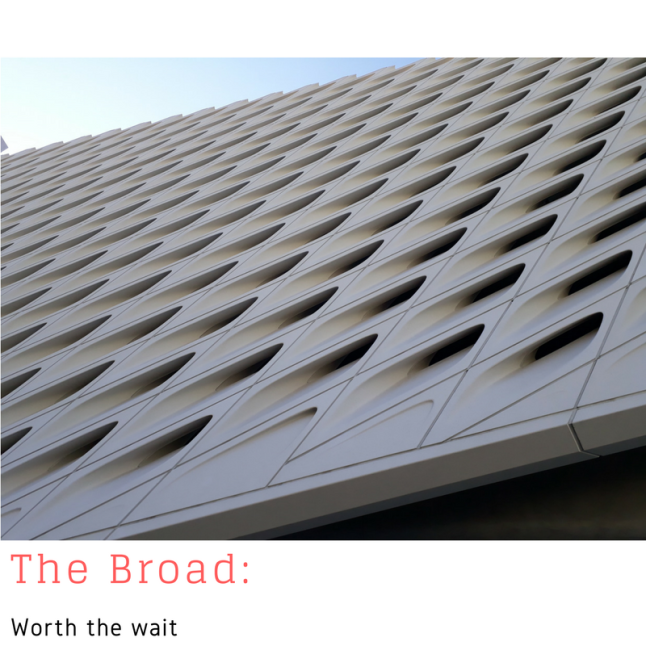
So…it was almost 1pm and the whole morning’s shot. We wanted to go to The Broad, but after checking online, advanced tickets were no longer available. The next open schedule would be on October 3rd and this was completely unacceptable (our flight back is on the 20th!). The hubs insisted we go anyway and just try our luck. 20170909_162158

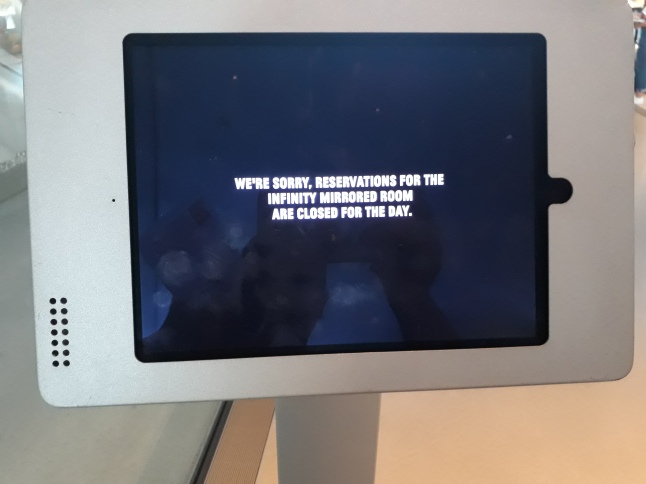
I’m so happy that we did! When our Lyft driver dropped us off, there was no line at the front of The Broad! They immediately handed over our museum tickets and we walked inside! The great thing about The Broad is that it’s free for everyone to enjoy. The Infinity Mirrored Room by Yayoi Kusama is arguably the most popular exhibit in The Broad that time we went. There was a queue to see it and were in line about 30 minutes before we got to sign up on the iPad. The app on the tablet will be inform you how long you have to wait to get inside the Infinity Mirrored Room. The staff of The Broad were regularly informing all of us in line that the slots for the Infinity Mirrored Room was full and that the sign up was purely standby. Again, we wanted to take our chances since we were at The Broad already.

So we clearly didn’t want to wait 180 minutes just to see the Infinity Mirrored Room but we figured, ‘Let’s go around, if we’re done touring the galleries and we haven’t been called then we go tour Downtown.’20170909_164624

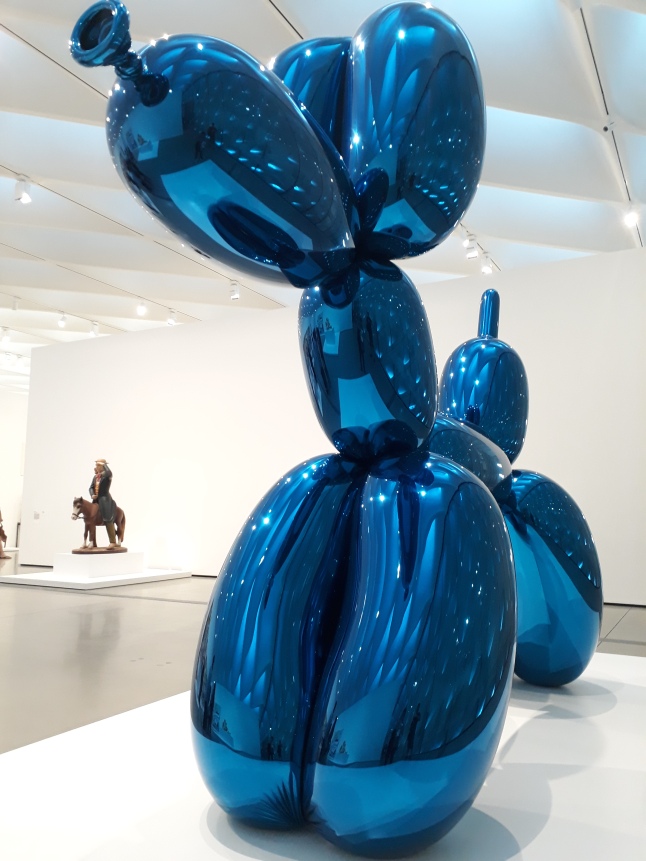
The galleries on the 3rd level of The Broad were wonderful! Wide open spaces filled with art of different textures, styles, colors, influences and creative process. From Haring, Koons, Warhol to Baldessari, Therrien, and Takashi Murakami, who had an 80-foot painting that was jaw-dropping beautiful. 20170909_16360520170909_163033

It was time for us to chat with our daughters again so we decided to leave The Broad and look for a place to eat. In the middle of our FaceTime, I got a text saying we could view the Infinity Mirrored Room! We dashed back inside and it was a wonderful 45second view of this mirror lined chamber of dazzling lights. I love how this installation has the tag ‘The Souls of Millions of Light Years Away’ because that is how you feel inside the small room : a small soul in an endless space with periods of darkness and bursts of dazzling light. Kusama’s vision for the room was pretty daunting but her execution was so perfect. We were so fortunate we got to see it!20170909_17435420170909_174344

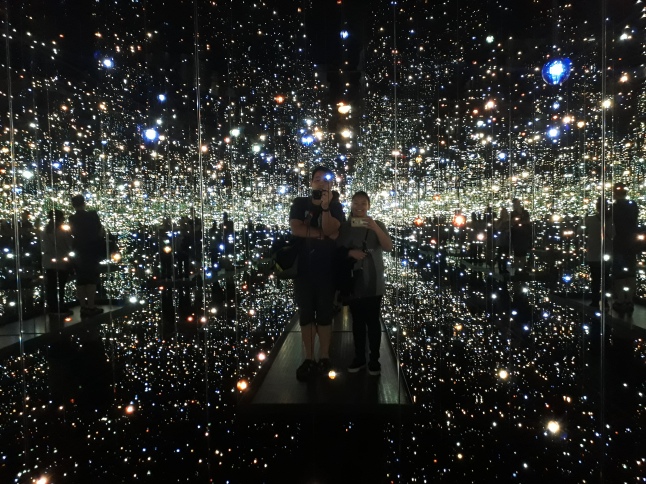
My tip for going to The Broad and seeing the Infinity Mirrored Room? Book tickets early. But on the off chance that you’re like me and you weren’t able to reserve those advance timed tickets, you should still go. We went on a Saturday afternoon and we thought we would have zero chances of getting in The Broad, much less The Infinity Mirrored Room! Turns out, with a bit of patience, we got to see both!image-0-02-01-146b19e517eef586859f0934f021ba2b2c93a60310fa9db48d652477391620d6-V

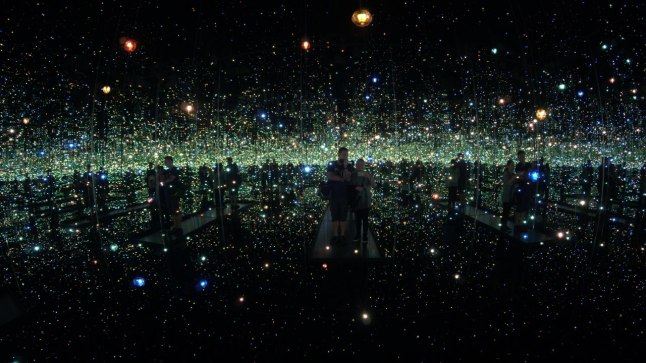
Since we were Downtown already, we also crossed off the Bradbury building and The Last Bookstore from our list – but that’s a post for another day!

image-0-02-01-d926c32d6f10683fc7caa9f93a86497a17235891f933db60697831aa35990760-V


Decorating Panda Cupcakes with your Child!

Screen Shot 2017-06-24 at 10.16.11 AM

From Google Images

I don’t know about you but my daughter loved these Monde Special Mamons that you could dress up as Pandas! They came out with these perhaps a year ago? What? You don’t remember them? Gasp! I don’t see them anymore which is really sad, but to be honest, even when they were available only the bigger supermarkets would carry them. I mean, the neighborhood Savemore  just didn’t make the cut.

Panda decorating


I recall my daughter would beg for those Panda mamons (which are like soft cupcakes)! She never forgot about them from the first time she was given them at a grand aunt’s house.

I wasn’t able to take pictures of the packaging and the royal icing decorations included in the package. However, CF Toys  did post a neat video on Youtube of how it works.

IMG_0667

They’re basically pre-packed mamons or naked cupcakes, about 6 per pack and they have sugar icing for the Panda’s skin and royal icing to serve as decorations for the Panda’s features.

You spread the icing thinly on the cupcake then add in the Panda’s features, they come in a variety so it’s really fun to play around so that each cupcake has a different facial expression. And the best part? After decorating your Panda mamons and taking pictures – you can eat the whole thing!

Z loved doing this. She never got bored of decorating her Panda mamons.

IMG_0666

Z carefully spreading the frosting

I let her do everything, from spreading the icing to sticking the “expressions” on the cupcake. It can be pretty messy so make sure you make your child wear an apron, a damp towel nearby would help too.

I wish they had these again, it’s a fun bonding idea for you and your child. It helps stoke their creativity and with gripping, spreading and “pasting” the Panda features, their motor skills are once again developed. The laughter and giggles you’ll be sharing with your child while doing your Panda cupcakes are also priceless!

IMG_0669

Z’s beautiful Panda Special Mamon!

***This is not sponsored by Monde in any way***

Soap Surprise! An easy, practical and unique gift idea!

March last year I enrolled in a soap making class in Makati. It was a cold process soap making class that I will perhaps write more extensively about next time. This time I want to share with you some of the easy soaps I have done since then.

Soap Surprise!

Easy soaps? What do you mean? Well, as I’ve mentioned, the cold process soap making method (which I learned at the workshop that I attended) was a heck of a lot more complicated than the melt and pour soap making method. Primarily because, as the name implies, for this soap all I had to do was melt the soap base and pour them in molds. Once they were firm enough, I pulled them out and ta-dah! Soap is rocking the house.

20160508_074828

I wanted to make soaps as my daughter’s Christmas gifts in school. I wanted them to be homemade, cute and useful.

20160508_075743

Here are some of the things to take note of if you want to do this project. I used the melt and pour soap base I had ordered many months before from Soap Scentral. They cost about 220 Pesos per kilo. I also got the soap molds from them and they were pricey at 999 Pesos. I wanted to put erasers inside the soaps I made, I got this idea from Pinterest. In fact, the steps that I took were outlined fabulously well in the tutorial on Soap Deli News, I just chose to use erasers so that when they’ve used up the soap they could still use the erasers for school! The erasers I bought as a set for less then a hundred pesos.

I basically melted the soap in the microwave then poured them in the molds, when it could hold the weight of the cute erasers I bought I placed the erasers on top of the first layer of soap.

20160511_180629

Make sure to spray all the surfaces that the soap will touch with alcohol, it will make the soap adhere better to the dry soap as well as to the erasers that you’ve put in. Then, I coloured the base of the soap using colorants which I had also bought from Soap Scentral. The red colorant was 190 Pesos while the purple one was 230 Pesos. Once they were dry, I popped them out of the mold and sealed them with cling wrap. I didn’t want all sorts of things to stick to the soap so the seal really helps a lot with handling.

20161203_173439

I wanted to make the soaps extra cute by adding personalised gift tags to them! Screen Shot 2017-06-24 at 1.03.46 AM           soap gift tag 6 to a sheet

My daughter loooooved this soap idea and she made sure she kept one for herself! I even gave some of the soaps to her teachers. I also didn’t stop there, I coloured small batches of the soap, placed them in the molds and made more soap for the house.


20160512_090746

20160512_100022_001

This is a really fun and different activity you could do with some help from your child. I promise you,he or she will be so proud holding the finished product in their squeaky clean hands!

20161206104357


All stitched up!

I’ve been recently added to a group that is all about tutorials (we can’t get enough of them!) and even if a lot of the tutorials there are for sale, there are also free tutes for people to practice and learn from. One of them is a tutorial posted by Claire Wallis who is a bangle-crazy self-taught artist. She has such an eye for detail and color!

Yummy stuff right? She came up with a tutorial on how to make knitted polymer clay and I wanted to make a necklace using this technique for my cousin who recently gave birth. My cousin loves to knit and I came up with a quick and easy necklace she could hang wherever for her baby.

What do you think? I tried passing the clay through an extruder but the strips would come out all jagged no matter how many times I conditioned the clay so I manually rolled each and every snake. I hope it’s something she will like 🙂

A Colorful Christmas and A Happy New Year!

For the last month of last year, my local guild organized a bead swap and the theme of course, was Christmas! I was lucky enough to get a rainbow of colors of Pardo clay balls which I figured would be safe enough to use even during my pregnancy. What’s so special about this Pardo clay is that it doesn’t have any  phthalates and is actually made out of beeswax. They are very easy to use and come in eye-catching colors 🙂0ceab-6829951773_ab8f988146_z

I wanted to use my bunch of Pardo clay as soon as I got them but every ball of color was only the size of a marble so I had to think hard about what I wanted to make for our “Christmas Ornament Bead Swap”.

There’s this artist who I admire very much. She makes beautiful pieces from polymer clay and her work is always so intricate and elegant. I love how she mixes her colors so beautifully! On Etsy, her name is Starless Clay (http://www.etsy.com/shop/StarlessClay) and she served as my inspiration for the challenge. Please visit her site because honestly, her style of claying is quite difficult. My finished projects don’t look as polished as hers and I need more practice coiling the strands of clay. Here are my little ornaments to bring in some holiday cheer!


I hope that you all had a wonderful Christmas! Happy new year to you and yours! ❤

Cornstarch, baby!

Has it been that long since my last post? Unbelievable! Sorry about that. We’ve been kind of busy since we’re expecting our bundle of joy by May next year! I’m about 5 months along and my middle is getting bigger and bigger and it’s getting harder and harder to move around. I’m thankful for everything though 🙂
I have been discouraged from playing around with polymer clay because of the fumes, but I just couldn’t stop myself (I wanted to clay so badly since members of the Philippine Polymer Clay Guild were coming out with amazing stuff) and I looked up the recipe for cornstarch clay online.

Cornstarch Clay is super easy to make. Baking Soda, cornstarch and water and that’s it! What I didn’t realize is how difficult it would be to sculpt. The one I ended up with kept flaking and leaving white powder all over! I had to break off thick dough all the time since thin portions would crack easily. I also completely forgot to take a photo of it after making and stored it in our refrigerator for a week. This is the result…
So that was a waste 😦 I did manage to mold some stuff up before I stored the clay in the ref and my projects took about a day to dry. Its not bad but way too thick for my taste and I miss how easy it is and mess-free to work with polymer clay. Here are some of the things I made:
I still need a lot of practice with cornstarch clay. Here’s a website you might want to check out if you’d like to work with air-dry clay, the tips and the projects posted there are inspiring! http://www.air-dry-clay.com/

Belated Bead Swap

Have you ever joined a bead swap? Last July, the local clay guild that I am a part of had its first ever bead swap. It was my first full-scale ‘activity’ since I had to come up with 18 beads using only black and white clay. It seemed easy in the beginning because there weren’t many rules: no size limit, no restrictions with design and shape. I was bursting with excitement and I was so eager to get started! Admittedly, I kind of crammed working on the beads until the last possible minute and realized belatedly how difficult it was to work with black and white clay!

Here are the beads I came up with, they’re far from what I had in mind but I was pleased with the fact that I came up with 18 uniquely designed beads 🙂

I love the beads that I got in return!
Look at how talented the members of my guild are!
Here are the names and sites of the artists that joined the bead swap, please check them out:
Genty’s Clay Haven: http://www.aquamaze.multiply.com
Xander’s Gift Shop: www.facebook.com/xandersgiftshop
Little Creations Clay Shop: http://littlecreations.multiply.com/

Yellow Bugs

Just a quick visit to the blogosphere today, its ironic how Im only required to report for work for three hours a day but I still never seem to have enough time to finish the things on my To-Do list. Now in the plural form, by the way. Well, one of the things I put down on one of my lists (haha) is to organize and re-name the photos in my laptop. I came across this one which is a favorite of mine 🙂

My husband’s prized possession is his 1966 volkswagen, its actually the one that sits inside our garage while my car bathes in the sun! I was hanging around our small garage the entire afternoon since my oven is at about the same spot where I took this photo and I didn’t even notice the moth (it is a moth, right?) on the vents of the beetle until my brother pointed it out to me. I wasn’t able to take a closer shot but the color of the moth is the same shade as our beloved bug 🙂

Here’s to happiness in all shapes and sizes 🙂 Hope you have a great week!

Best Vacation

Just a quick blog about a trip my family and I went on last April. We desperately needed a break during this time and we went to one of the most beautiful islands in the country. White sand beaches, crystal clear waters rife with colorful fish and vibrant coral. Going through the photos now, I have to stop myself from checking for airfare promos :p

We prepared for this vacation and we made sure we brought our clay with us 🙂
 Best Vacation
Hope you like them!
Best Vacation
Enjoy your week!

Clay

I attended a polymer clay workshop last October 2010 and I’ve been “claying around” since then 🙂 My sisters and I started an online shop called Thought of You (www.facebook.com/thoughtofyoushop) and we do all kinds of things with clay. I know I’m still very new at this but here are some photos of the work we’ve done which I am exceptionally proud of.


Update (October 2017): We are no longer accepting custom orders for polymer clay. My sister and I have decided to pursue something else, it is still something we enjoy doing in our spare time though.