I’m seeing Red…Velvet Cupcakes

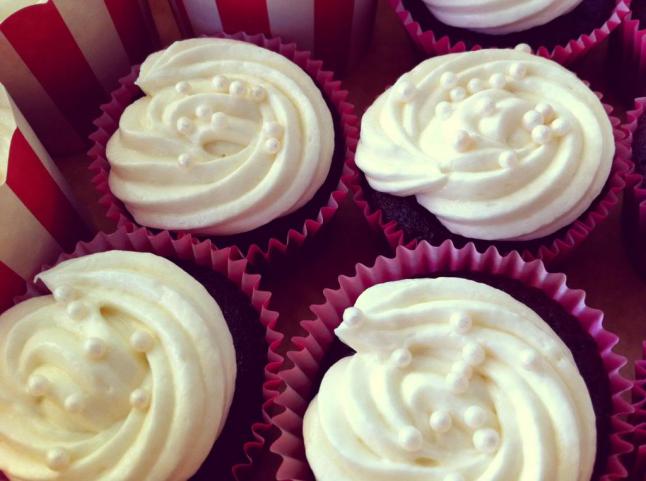
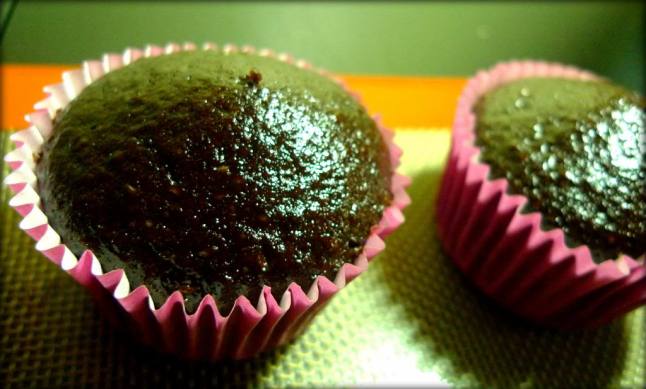
I’ve mentioned in this post how much a fan I am of Bake Happy and a while back, she posted this recipe for Red velvet cupcakes that I knew I just had to try. I am CRAZY about red velvet cupcakes! They were my mother’s favorite and every time I see them or taste them I am reminded of her. When I first started baking, red velvet cupcakes were the very first ones I started to make. Needless to say, I had a lot of failures and so, I was on the quest to look for the best red velvet cupcake recipe floating about. I’m happy to say the search has finally ended.red velvet cupcakes with cream cheese frosting2
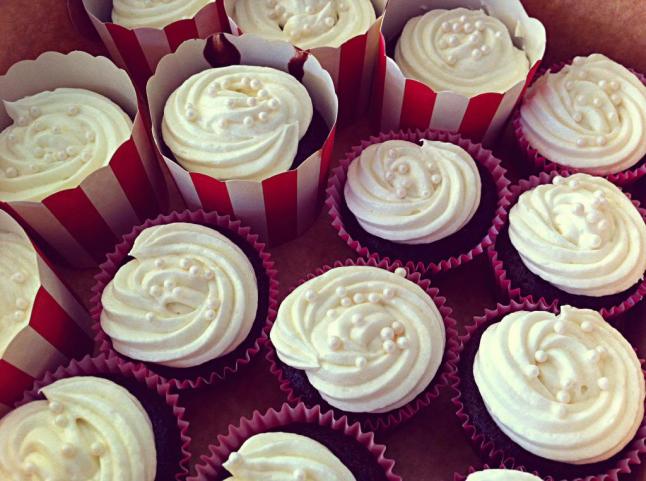
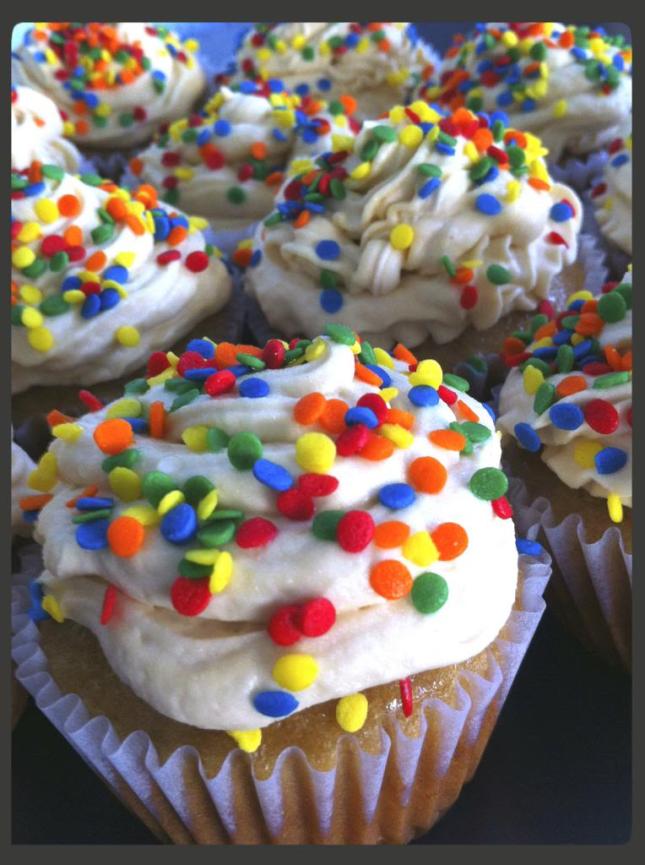
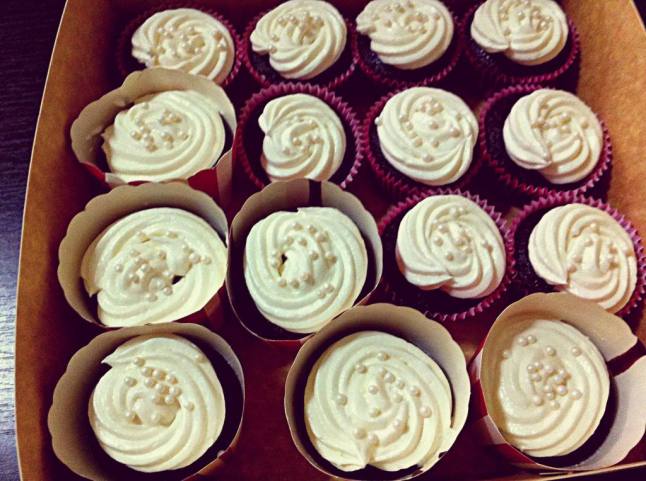
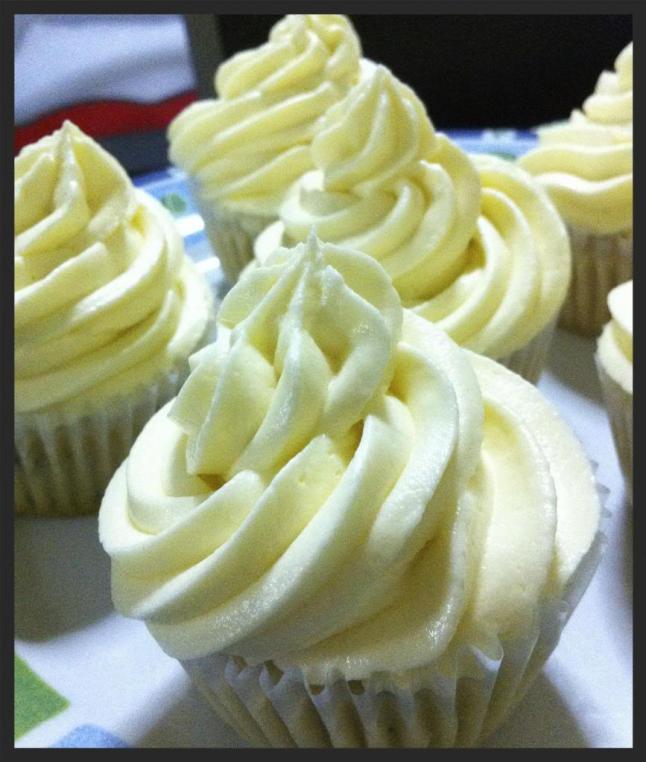
These red velvet cupcakes are divine! The old recipes I’ve tried produced dry cupcakes, dense cupcakes, bland ones or ones where you don’t really get that chocolate flavor. This recipe solves all those problems. The cupcakes that came out were very light, moist and had that chocolate-y taste to it that lingers in your mouth. They smell so good too!red velvet cupcakes1
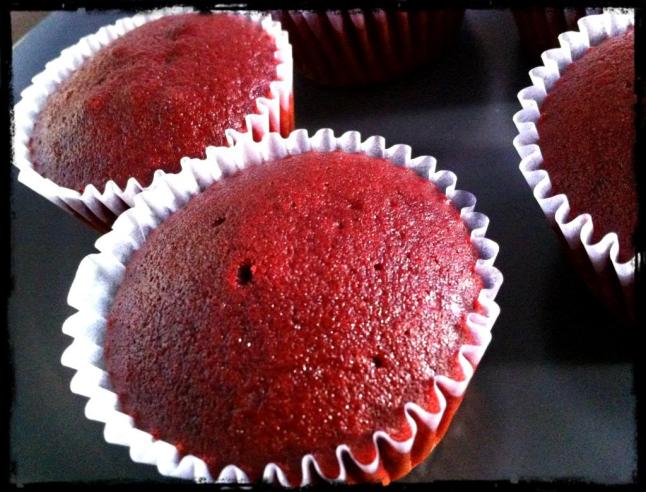
The original recipe was posted on cupcakeblog.com and Aikko tweaked it by substituting Yakult for the buttermilk. I chose to use the buttermilk powder that I purchased at a local health store, I use it all the time for recipes that ask for buttermilk and so far it hasn’t failed me. I also doubled the amount of cocoa powder to really get the chocolate taste and I divided the recipe by three so I wouldn’t have to stay next to my oven for days.
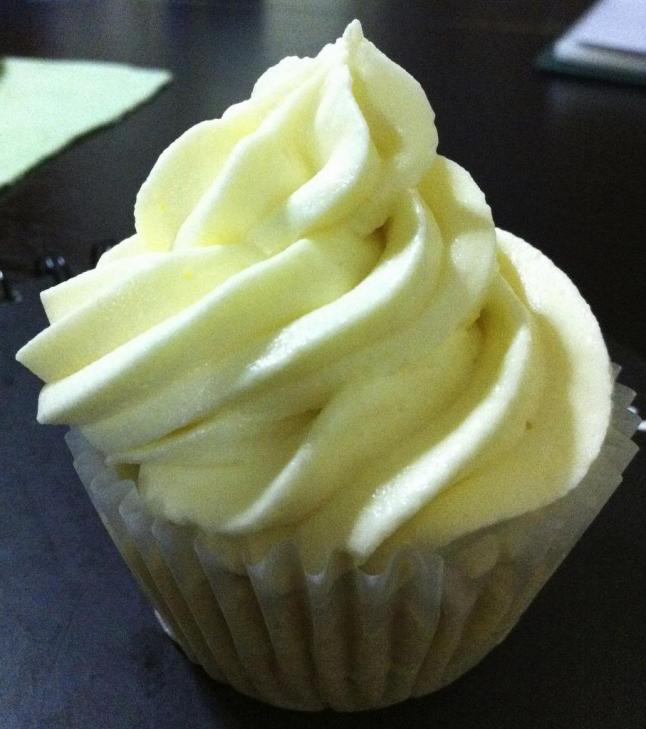
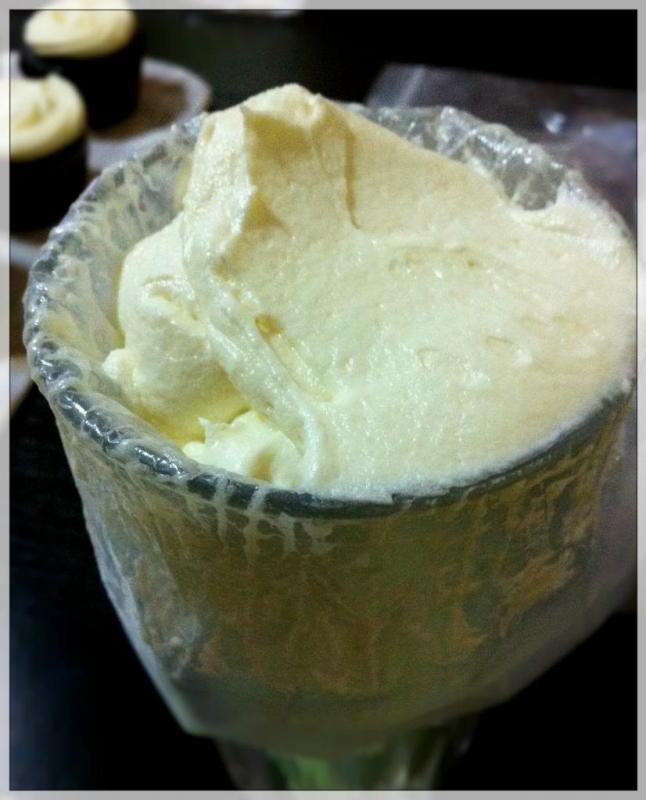
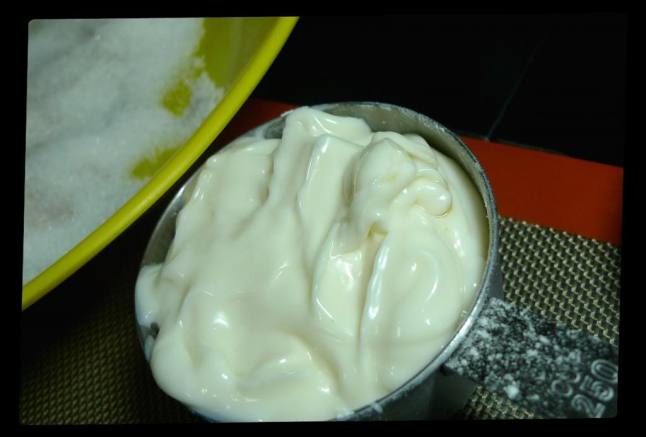
For the frosting, I stuck with Bake Happy’s recipe for cream cheese frosting. Perfect combo!
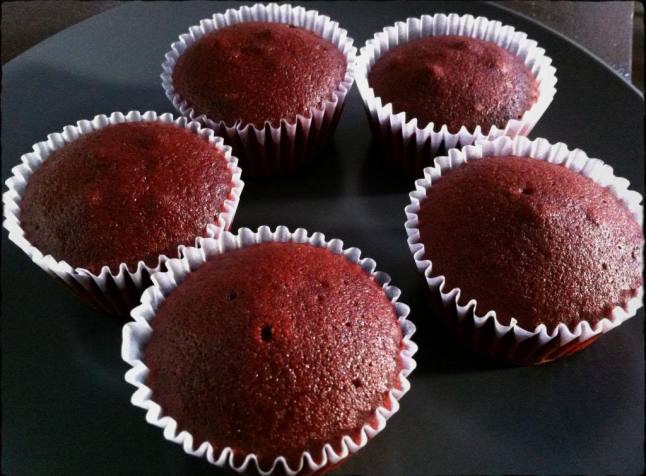
red velvet cupcakes
Red Velvet Cupcakes
Ingredients:
1 and 1/4 cup all-purpose flour
3 tablespoons cocoa powder
1/4 teaspoon baking powder
1/4 teaspoon baking soda
1/8 teaspoon salt
1/2 cup buttermilk
1 teaspoon apple cider vinegar
1/2 teaspoon vanilla extract
1 teaspoon liquid red food coloring
170 grams sugar
1/4 cup unsalted butter
1 egg

Procedure:
1. Combine buttermilk, red food color, vinegar and vanilla extract. Set aside.
2. In a bowl, sift the all-purpose flour, cocoa powder, baking powder, baking soda and salt. Mix well and make sure there are no lumps.
3. In a mixer bowl, cream butter and sugar until light and fluffy.
4. Add eggs one at a time.
5. Add one third of the dry ingredients and mix slightly.
6. Pour in one half of the wet ingredients.
7. Alternate mixing the dry ingredients with the wet ingredients, end with your flour mixture and mix until everything is incorporated.
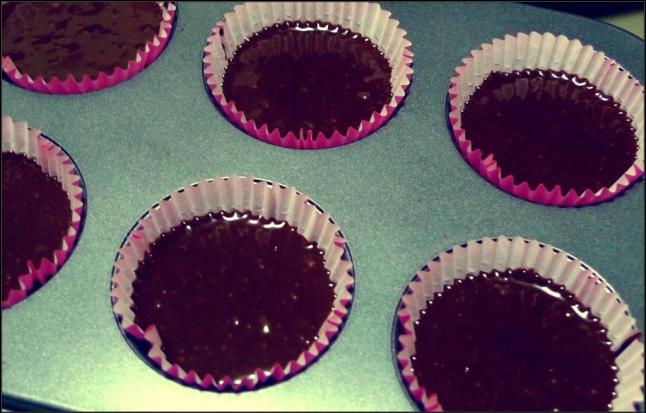
8. Divide batter into cupcake liners and place inside pre-heated oven, 350’F and bake for 15 minutes.
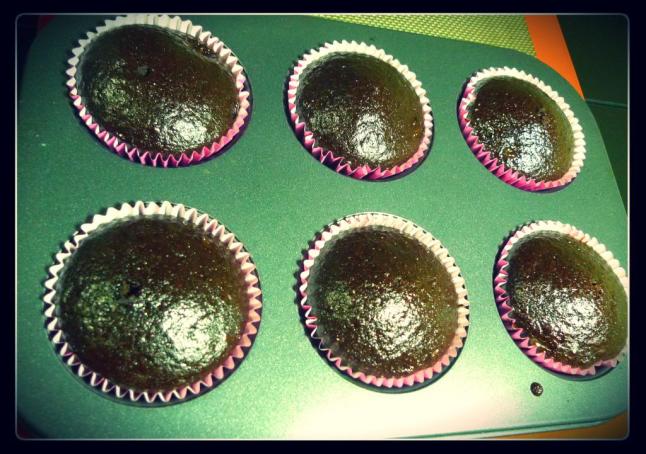
9. When toothpick inserted in center comes out clean, remove cupcakes from the oven and cool on a wire rack.

Cream Cheese Frosting:
1 cup cream cheese
1/4 cup unsalted butter
1/4 cup shortening
454 grams icing sugar
pinch of salt
1 teaspoon vanilla extract
1/8 cup milk

Cream butter, shortening and cream cheese until smooth. Add the vanilla extract. Gradually add the icing sugar. Add the milk and beat until smooth. *I put the cream cheese frosting in the chiller for several hours so I can pipe them on the cupcakes*red velvet cupcakes with frosting


Peanut Butter Perfection

Peanut butter is something we have to have at home. My husband, unfortunately, is allergic to it but that just means more for me! One of the reasons why I joined a cupcake workshop at Ingrid’s Sweet Haven Patisserie was because of the peanut butter cupcakes chef Ingrid would be teaching (and the Tiramisu!).peanut butter cupcakes with sprinkles
Of course I couldn’t wait to recreate the cupcakes at home. Now the recipe makes a lot so if you’re making these and there’s only a few of you at home, remember to send some over my way!peanut butter cupcakes with sprinkles2
See how moist the cupcake is? How creamy the peanut butter frosting? I love this recipe! The peanut butter flavor is not overwhelming and when combined with the frosting, results in the perfect amount of sweetness.

You can pile the frosting up high on the cupcake, the sprinkles are not really necessary but I also have to have sprinkles on my cupcakes!peanut butter cupcakes with sprinkles4
Peanut Butter Cupcakes

Ingredients:
2 and 1/2 cups all purpose flour
1/2 teaspoon fine salt
2 and 1/2 teaspoons baking soda
1/2 cup unsalted butter, room temperature
150 grams smooth peanut butter
150 grams brown sugar
200 grams white sugar
3 large eggs
1 and 1/4 cups fresh milk + 1 and 1/2 tablespoons vinegar

Procedure:

1. In a mixing bowl, combine the flour, salt and baking soda without sifting
2. Using a mixer, cream the unsalted butter, peanut butter, brown sugar and white sugar until light and fluffy
3. Add the eggs, one at a time
4. Pour in the milk with vinegar
5. Add the dry ingredients and and mix until well incorporated. Do not overbeat
6. Divide and pour into cupcake liners
7. Place inside a pre-heated oven 350 degrees F and bake for 20mins or until a toothpick inserted in the center comes out clean
8. Transfer to a wire rack, cool cupcakes completely before decorating

Frosting:
1/4 cup unsalted butter
1/4 cup refrigerated margarine
125 grams smooth peanut butter
1/2 teaspoon pure vanilla extract
2-3 tablespoons fresh milk
3-4 cups confectioner’s or icing sugar

In a mixing bowl, combine butter, margarine and peanut butter until thick. Add vanilla, milk and gradually add the confectioner’s sugar until desired consistency is reached.peanut butter cupcakes with sprinkles3

My Cream Cheese (Frosting) Woes

More like a love-hate relationship. With Cream cheese frosting.
There are days when it works like a dream and it makes the loveliest swirls on cupcakes.cream cheese frosting
And most days, it makes a sloppy, drippy mess that tastes great but looks awful.creamcheesefrostingthatworks_zps62531809
I’ve experimented. A lot.
More cream cheese, less butter. No butter, some shortening. With or without milk…or cream. A lot of powdered sugar. Not that much.
It really is hit-or-miss for me.cream cheese frosting copy
How do you handle your cream cheese?creamcheese frosting2

Bake Happy’s Chocolate Cupcakes

There are a gazillion recipes to be found on the internet and there are plenty that get rave reviews from hundreds of readers. Unfortunately for me, there are good recipes I’ve tried that produce results I’m not very happy with. So when I do find a recipe that I like, chances are all the other stuff they post are right up my alley and I’ll be following that baker/site like a crazy person!

I stumbled upon Aikko Aragon‘s blog when I was searching the net for local bakers. Bake Happy is packed with tutorials, recipes and great photos of Aikko’s baking adventures. I love how Aikko writes! She’s super funny and when you read her posts it’s like you have been friends for a long time. I tried her recipe for the perfectly moist chocolate cake and oh my chocolate! I have found the one. It’s got a secret ingredient that makes it extra fluffy and tasty in my opinion. Can you guess what it is?maronnaise
 Mayonnaise!!!
I had to tweak the recipe a bit since my oven is really small and can only fit one 6-count muffin pan at a time. The original recipe can of course be found on the fabulous Bake Happy site.
bakehappy chocolate cupcakes

Moist Chocolate Cake Recipe
Adapted from Bake Happy (bakehappy.blogspot.com)

Ingredients: (Yield: 16 cupcakes)

1 and 1/4 cup cake flour
1 and 1/4 cup sugar
1/2 cup cocoa powder
1 tsp baking soda
2 tsp baking powder
3/4 cup water
3/4 cup mayonnaise
1 tsp vanilla extract

Procedure:
1. Preheat oven to 350*F, assemble cupcake liners in pan
2. In a bowl, mix mayonnaise and sugar until smooth
3. Combine flour, cocoa powder, baking soda and baking powder
4. Add a third of the flour mixture to the mayonnaise mixture
5. Add half of the water
6. Repeat steps 3 and 4, end with the flour mixture. Mix well.
7. Add vanilla extract
8. Scoop into cupcake liners and bake at 350*F for 15 minutes
9. Insert toothpick after 15 minutes, if it comes out clean then it’s done!
If there are still crumbs sticking to the toothpick, bake for about 5 more minutes.bakehappy chocolate cupcakes1

 They say that the true test of a good cupcake is if it tastes good “naked” or without any frosting, and this recipe – although its delicious with buttercream frosting and chocolate ganache –  it still tastes fantastic without!bakehappy chocolate cupcakes2

Thank you Aikko, you’re the best! 😀

A Cuppy Puppy Experience

Hi there! How are you? I hope you’re doing spectacularly well. As for me, I’ve been baking. I know, I know, I should take pictures and blog about what has been keeping me up most nights (it’s not Baby Z!) but I keep forgetting to take pictures of what I’ve baked! Let me correct that, I end up taking pictures using my mobile phone in very bad lighting conditions, making it embarrassing to post. Anyway, next time I will have to come up with a better schedule and take into consideration a proper photoshoot.

WELL. This post is all about a basic cake deco class I joined some weeks back. The talented artist behind Cuppy Puppy Bakehouse is Chef Joanna Penaloza Romero, and I was encouraged by a friend to take her class because she is the only one who teaches the method of covering a cake with ganache and producing sharp edges in one’s cakes.ganache cake cuppypuppy class picture
The class took place in the Cuppy Puppy Studio which was in the south, since I don’t usually frequent that area I got lost and was almost late for the workshop! Chef Joanna is a beautiful, young woman who shared with us how she started in the business. She was very patient and encouraging throughout the whole class.

Guess what? I wasn’t able to take enough photos! For a new baker like me, everything was twice as hard and I was working extra slow. Ganaching a cake is serious business. Instead, let me share with you what my finished decorated cake looked like and know that this cake was so hard to make!ganache fondant cake cuppypuppy

 This was my cake. Not bad, right?ganache fondant cake
Here’s an Instagram photo of what the cake looked like after transport (the butterflies wings collapsed) and after a slice (I couldn’t help it!). The cake was delicious! It was baked already by Chef Joanna, we just decorated it for the workshop.
Will be posting more of my baking escapades soon! Be safe 🙂

Heny Sison’s Basic Fondant Class

I have been baking cupcakes like crazy. Pretty much every chance I get. When Baby Z is asleep, when my husband gets home early and won’t have work the next day, every single weekend – I have baked cupcakes. Most of them have turned out to be pretty good.

I figured I’m brave enough to try cakes. I have been spending a ridiculous amount of time salivating over cakes, there are just so many gorgeous ones (Pinterest alone has me clicking and zooming for hours).

I enrolled in yet another class! I already missed the Basic Cakes and Icings class so I tried out the Basic Fondant Class. Here are some of the pictures!

We used Pound cake because its sturdy and stable to hold the fondant


Making Fondant is so incredibly messy!
with Chef Aggy Villabona
My cake!
 
We were taught how to make Marshmallow Fondant, gum paste from scratch, and how to decorate the cake with swags and ribbons. We ended pretty late in the day, I was half-covered in flour but the cake? It was heaven in a box!

Heny Sison Cupcake Workshop

My first cupcakes workshop was great but I felt like it didn’t dwell so much on the quality or the taste of cupcakes, instead it focused a lot more on the decorations and the cost of starting a cupcake business. Since I am new to baking, making it into a business was far from my mind. I wanted to enroll in another workshop that focused more on the taste, a class that would really break down the steps for you and show you why you had to do it a certain way.

Lucky for me, I was able to sign up for a Heny Sison workshop. She is a renowned chef with much experience behind her and she owns a culinary school that also offers one-day courses. After attending her workshop (taught by Chef Carrie Madrid) I knew I finally hit the jackpot.

The cupcake baking workshop was incredibly friendly to beginners like me. They tell you why you have to pre-heat your oven. What you can use to substitute certain ingredients, which icing is perfect for our hot, humid weather. Tips on how you can create moist cupcakes from scratch. It was an amazing class where I learned so much and was able to make more cupcakes of different kinds.

The chef also talked about the importance of texture, why we have to sift our ingredients (because we want a smooth texture of course!) and why the sponge cupcake is so much fun to make (its so light and fluffy and you can make sinful Tres Leches and Tiramisu cupcakes, mmmm!) even though the sponge itself is harder to bake.

Different kinds of chocolate cupcakes, vanilla and sponge cupcake plus different kinds of frosting!
 

Before I knew it, it was already 9 in the evening and my sister and I were the last ones to leave the class. There was such a wealth of information that we were hopelessly laughing on the way home, wondering if we would be able to remember everything. No wonder Heny Sison has got a reputation for doing amazing food. They really prioritize taste more than anything else.

My sister and her cupcake

I love my finished cupcakes! I love how delicious they were and how everyone who tasted them said they were pretty good. I am definitely going to enroll in more of the classes taught at Heny Sison because it was truly worth it. Do you want to see what we made? Here are some of the cupcakes I brought home from the workshop 🙂


They looked good and they tasted ame-hey-zing! Now I am hungry again lol.

Cuppy cuties

I’m addicted to Cake Boss. I know a lot of people probably are and with good reason! Buddy and company are wonderful bakers and each cake they make looks great and I bet, tastes absolutely divine!
Seeing as I won’t be working with polymer clay anytime soon (I work real slow so this takes up too much time away from baby Z plus I worry that the fumes might get to the baby) – I decided to learn how to bake! As in cake flour, chocolate, and mixer kind of baking lol. My husband was thrilled with the idea since baking edible goodies is something he could benefit from (read: eat!) and so I started looking up classes.

I joined a cupcake baking workshop at a place called Chocolate Lovers – sounds delish right?!

The baking portion was pure demo by the Chef but we did get to play around with the cupcake decorations 🙂 I have to work on piping the icing but I really like the colors that I used for my cupcakes.


It was so much fun! Can’t wait to start baking!